Classic Shirt / 01
ROBLOX SHIRT TEMPLATE
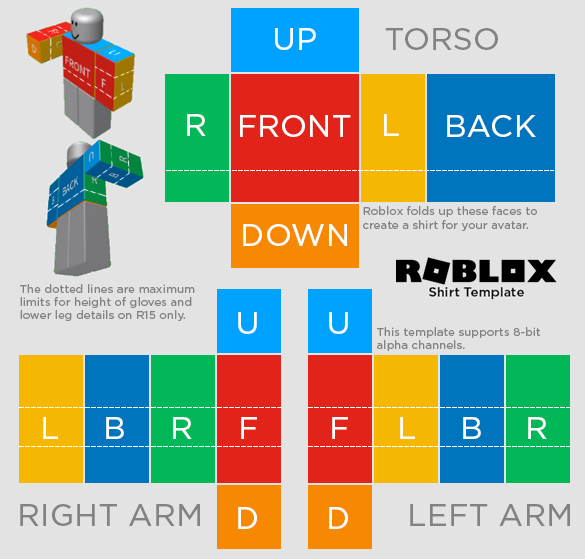
Use the torso and arm faces for clothing that wraps the upper body. Keep graphics inside the labeled panels and preserve transparent areas outside the design.
- Canvas
- 585 × 559
- Format
- PNG
Roblox Clothing Templates
Download a transparent 585 × 559 Roblox Shirt or Pants template, place artwork on the labeled faces, then preview and check the finished PNG on one live R6 or R15 Avatar.
Classic Shirt / 01
Use the torso and arm faces for clothing that wraps the upper body. Keep graphics inside the labeled panels and preserve transparent areas outside the design.
Classic Pants / 02
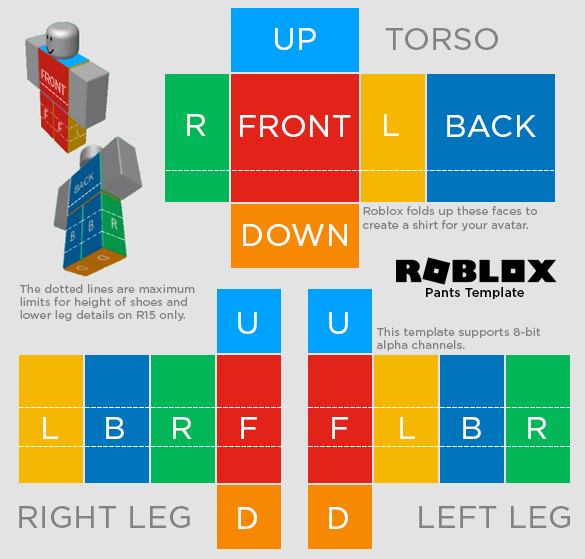
Use the torso band and leg faces for classic Pants. Check both leg directions and the waist transition before adding the Shirt preview.
How the flat image wraps
Often visible at shoulders, wrists, waist, or the top of a limb.
Place focal graphics here, but keep important pixels away from the fold.
These panels connect front and back artwork around the body.
Check text direction and whether patterns continue across both side edges.
Small but visible when the Avatar moves or is viewed from below.
Keep essential details inside the safe area and use matching edge color.
Flat to 3D proof
The labeled Shirt file is the source. Follow its colored front, back, and side faces into the live preview, then compare the same PNG on R6 and R15 before changing the artwork.
Start with the red Front, blue Back, and green or yellow side faces. Keep the canvas at 585 × 559 while you edit.
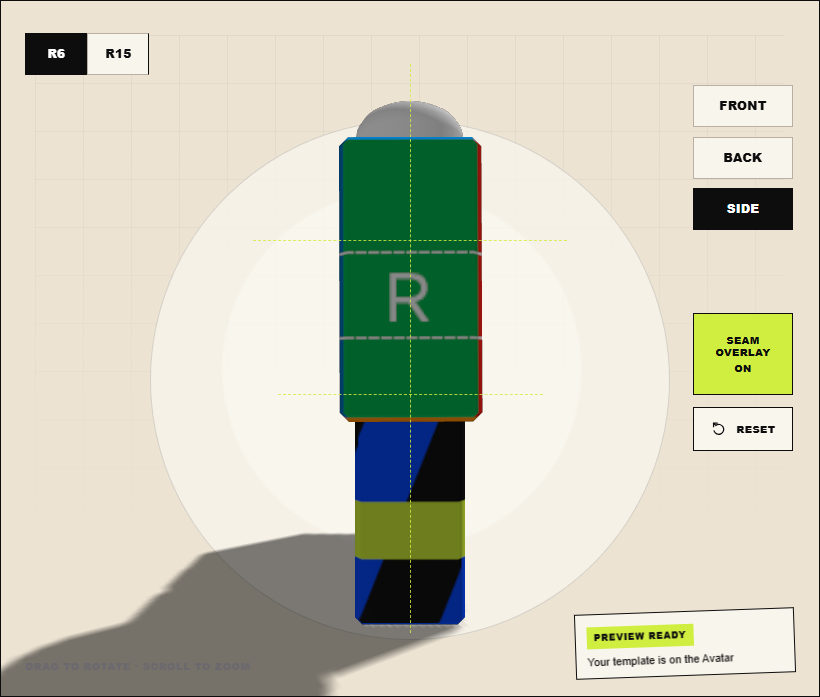
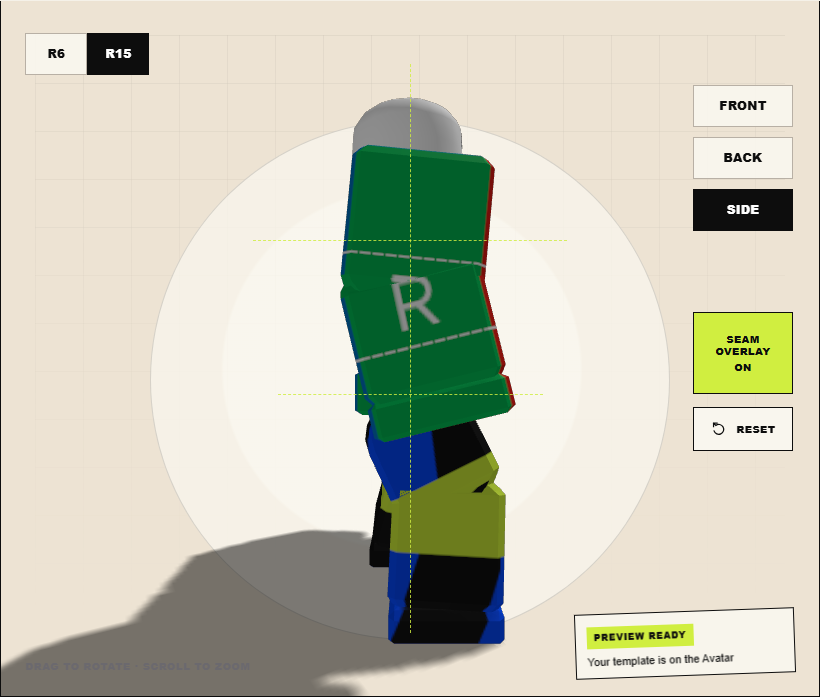
The right-side panel stays green on both. R6 shows the broad face; R15 shows where the same artwork bends across extra joints.
One PNG, two rig checks
Classic Shirt and Pants files keep the same 585 × 559 panel map on R6 and R15. What changes is the body beneath it, so test the same finished PNG on both before you publish.
See the full R6 vs R15 checkFrom file to fit
Start with Shirt for torso and arms, or Pants for waist and legs.
Work on the original 585 × 559 canvas and preserve transparency.
Drop the exported PNG on the matching tab and inspect every angle.
Correct visible seams, retest both rigs, and only then continue to upload.
Common template mistakes
Resizing changes every panel boundary. Return to a 585 × 559 source.
Run the full file check ↗Correct the affected front, back, left, or right face rather than flipping the whole image.
Match neighboring edge colors and add a small safe bleed where a hairline appears.
Fix white lines and seams ↗Move text and thin marks inward so rig joints and panel edges do not break them.
Check R6 and R15 joints ↗Template answers
Classic Roblox Shirt and Pants templates use a 585 × 559 pixel canvas.
No. A classic Shirt wraps the torso and arms from a labeled template. A classic T-Shirt is a square image placed on the front of the torso.
No. They use the same canvas dimensions but different panel layouts. Start from the matching template.
Yes. Keep areas outside the intended classic clothing panels transparent and export as PNG so a solid background is not added around the design.